Sunday, April 8, 2012

About Our Eggs

This blog post will serve as a PSA for Circle C Farm (Cleveland Farm)'s eggs.

Currently we have 19 hens.
Nine New Hampshire Reds:  Egg Color:  Light Brown to Light Terracotta
Two Easter Eggers: Egg Color: Pale or Mint Green/Blue
Four White Leg Horns: Egg Color: White
Three Production Blacks: Egg Color: White
One Crevecoeur:  Egg Color: White (we think this one is a hen - and if so, she will only lay once a week)

We have more (23) pullets (hens) growing, however they won't start egg production until probably mid July.  Of the 23 up coming hens, we have:

Easter Eggers (green/blue egg), Brabanters (cream/tinted egg), Faverolles (cream egg), Buff Orpingtons (light brown egg), Australorps (brown egg) and Welsummers (either brown speckled eggs or dark/terracotta brown eggs).


How are your chickens housed?

Inside of the run looking toward the hen house.

We have a coop/hen house for our chickens.  This is where they retire for the evenings (roosting), this is also where the hens go to lay their eggs.  We also provide a protective run for them to go outdoors in during the major part of the day if they'd like. Our girls are Cage-Free and do get to Free-Range. This makes for happy hens.  And when the hens are happy (and not stressed) they lay better.  If a hen is stressed for any reason, she may go for a period and not lay.  We like to keep our girls happy as much as possible!

Although we do allow our chickens to free-range, we do so under supervision for a few hours in the evenings after all the hens have laid usually until the sun starts to set.  We supervise them because we do live in an area where there are potential predators.  For example:  hawks, owls, fox, coyote, dogs, raccoons, opossum, skunks, and possibly bears, although rarely spotted in Hart County.


What do you feed your chickens?


When free -ranging, our hens love to scratch the pine straw out from under
 our azalea bushes to capture those succulent red worms!


Our chickens diet includes, but is not limited to:  a layer feed, grass, table scrapes (such as: veggies, fruit, whole grain and a source of protein), they do get supervised free ranging time to forage for bugs, worms and insects, flax seed (for omega 3's),  scratch feed once a day as a snack. They are offered a free choice of oyster shell.  Oyster shell is a great source of calcium for our girls and helps to keep the hens egg shells strong and firm. They also get fresh water 2 to 4 times a day, depending on how hot it is and how fast they are drinking it.

This is more for the meat producers, but still want to make clear that our chickens have not (and will not) receive growth hormones.

Remember, anything the chicken intakes (food or otherwise) is broken down and passed along through their eggs.  The healthier and more natural their diets, the better the eggs are for you!


You have different color eggs. Do they all taste the same?


Yes, they taste the same!  The different color to the egg shells is because of the pigment in the individual chicken.  When an egg is forming, and they all form the same, the last thing that happens to the egg is it gets a "paint job".  Under normal circumstances (and practices by the farmer) the eggs will have the same nutritional value (if the same size) and taste.  The only reason I can think of that might make an egg taste a little different is if the hen ate something with a stout flavor, like garlic. I do know that what a hen eats can affect the color of the egg yolk.  So to me, it would make sense about the flavor too as I just mentioned.  But it is only a theory, so don't hold me to that.

Get egg nutrition data here (select from the drop down menu, the size of the egg).

Monday, April 2, 2012

I've Created a Worm Bin on Wheels

Yes, that's right! A worm bin.....don't forget the wheels!  It's a very simple construction and cost me virtually $0.00  because I already had everything I needed, including the worms!

So maybe you're thinking, what on earth is a worm bin? (Some folks call it a worm farm or worm composting)  And why does she need one?  And if you're not thinking this and know darn well the what's and why's, skip down to the next paragraph.  A worm bin is a container with ventilation, it can be almost any type of container - buckets, trash cans, cooler, plastic bin with lid, etc.  You get the idea.  It is filled with scraps and worms to create more worms and rich compost for gardening.  And its a great idea to add a healthy snack to your chickens diet.

If you'd like to tackle this environmentally friendly and sustainability addition to your homestead, follow these simple steps.

First you will need a container.  To this container you will need to add mulched or un-mulched leaves (after a rain is good) or you could add shredded paper.  This will be the first (bottom) layer.  Be sure to make it a few inches deep (depending on the size of your container).  Here is mine, I used a rolling plastic drawer bin:


Next, you'll want to dampen the paper or leaves (if the leaves are already wet - skip this step). Careful not to add too much water!!


Then, you'll want to add Red Worms to your container.  For my Worm Bin on Wheels, I added about 20 per drawer.  I got all Red Worms straight from my yard in different locations.  We live on 6 acres, so there was plenty of room for seeking out these little guys.  If you want to seek your own, look under rocks, wood, piles of leaves, outdoor toys that have been laying in the same spot for a while - the little buggers love to live in these dark and damp places.  If you don't feel quite adventurous or don't have the resources to look for them, you certainly can mail order the Red Worms online.  Here are a couple of places you can look.


Or, you could do an internet search for Red Worms.

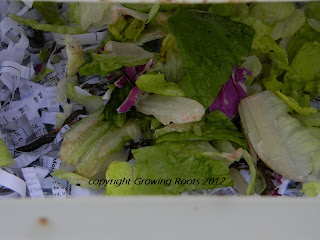
OK!  Next, after giving your Red Worms a new home, go ahead and give them table scraps.  It's better to give your worms the processed, enriched foods such as, pasta, bread, etc than to give them to your chickens. I'm not saying NOT to give those food items to your chickens, because I certainly do from time to time, just saying that worms are much better for them.  That is what chickens that live in the wild would eat, not "human food".   


Then, layer on top of the food scraps more leaves or shredded paper and dampen that.  Then the last thing to add is a piece of cardboard that fits the size and shape of your container.  It doesn't have to be the exact same size, but it shouldn't be too small either.  

Now you have your very own Worm Farm!! 

Worms like it dark and damp.  Keep your bin in a dark or dimly lit location.  In a tool or garden shed, the garage, a closet.  If you do keep your worm farm outdoors, be sure to move it to a warmer location if the temperature dip below freezing.  Otherwise, you're good to go!

Now see how simple that was?  And just think of the wonderful, rich soil you will have to use in your garden and flower pots! Not to mention yummy, healthy treats for your chickens!  Just remember, this process does take time.  Don't expect to create your worm farm today and have wonderful, rich composting soil and additional worms next week.  All good things come to those who wait! Yadda, yadda, yadda.......I know, it's such a cliche.  But in this case, it's true!  You may have enough composting soil from your worm farm by this fall (if you start now) to plant a few flower bulbs or those beautiful chrysanthemums.

Happy Worm Farming!! 


adaptations from source: Free Range Chicken Gardens: How to Create a Beautiful, Chicken -Friendly Yard by Jessi Bloom