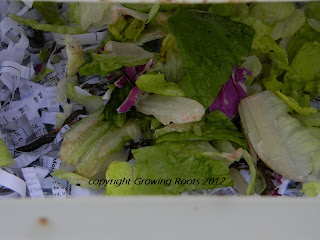
So maybe you're thinking, what on earth is a worm bin? (Some folks call it a worm farm or worm composting) And why does she need one? And if you're not thinking this and know darn well the what's and why's, skip down to the next paragraph. A worm bin is a container with ventilation, it can be almost any type of container - buckets, trash cans, cooler, plastic bin with lid, etc. You get the idea. It is filled with scraps and worms to create more worms and rich compost for gardening. And its a great idea to add a healthy snack to your chickens diet.
If you'd like to tackle this environmentally friendly and sustainability addition to your homestead, follow these simple steps.
First you will need a container. To this container you will need to add mulched or un-mulched leaves (after a rain is good) or you could add shredded paper. This will be the first (bottom) layer. Be sure to make it a few inches deep (depending on the size of your container). Here is mine, I used a rolling plastic drawer bin:
Next, you'll want to dampen the paper or leaves (if the leaves are already wet - skip this step). Careful not to add too much water!!
Then, you'll want to add Red Worms to your container. For my Worm Bin on Wheels, I added about 20 per drawer. I got all Red Worms straight from my yard in different locations. We live on 6 acres, so there was plenty of room for seeking out these little guys. If you want to seek your own, look under rocks, wood, piles of leaves, outdoor toys that have been laying in the same spot for a while - the little buggers love to live in these dark and damp places. If you don't feel quite adventurous or don't have the resources to look for them, you certainly can mail order the Red Worms online. Here are a couple of places you can look.
Or, you could do an internet search for Red Worms.
OK! Next, after giving your Red Worms a new home, go ahead and give them table scraps. It's better to give your worms the processed, enriched foods such as, pasta, bread, etc than to give them to your chickens. I'm not saying NOT to give those food items to your chickens, because I certainly do from time to time, just saying that worms are much better for them. That is what chickens that live in the wild would eat, not "human food".
Then, layer on top of the food scraps more leaves or shredded paper and dampen that. Then the last thing to add is a piece of cardboard that fits the size and shape of your container. It doesn't have to be the exact same size, but it shouldn't be too small either.
Now you have your very own Worm Farm!!
Worms like it dark and damp. Keep your bin in a dark or dimly lit location. In a tool or garden shed, the garage, a closet. If you do keep your worm farm outdoors, be sure to move it to a warmer location if the temperature dip below freezing. Otherwise, you're good to go!
Now see how simple that was? And just think of the wonderful, rich soil you will have to use in your garden and flower pots! Not to mention yummy, healthy treats for your chickens! Just remember, this process does take time. Don't expect to create your worm farm today and have wonderful, rich composting soil and additional worms next week. All good things come to those who wait! Yadda, yadda, yadda.......I know, it's such a cliche. But in this case, it's true! You may have enough composting soil from your worm farm by this fall (if you start now) to plant a few flower bulbs or those beautiful chrysanthemums.
Happy Worm Farming!!
adaptations from source: Free Range Chicken Gardens: How to Create a Beautiful, Chicken -Friendly Yard by Jessi Bloom
.jpg)


This may be a really stupid question, but what does the cardboard do? Do you just take it off and add more table scraps then more paper and place the cardboard back on top of that every time you add something to it? Great post, btw :) I've been planning on doing my own composting for awhile, just trying to plan the best approach.
ReplyDeleteSorry, I didn't think of explaining the cardboard bit. The cardboard has a little bit more weight to it (but definitely not enough to crush the worms) and will help to keep the scraps and paper/leaves compacted as if the worms were in the ground. But yes you can add more scraps and what not to the bin. Just lift the card board and the top layer and replace.
Delete